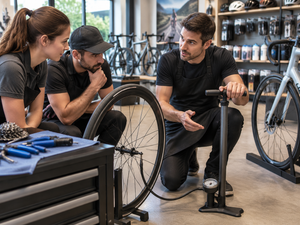
High-pressure bike pumps can be valuable products for road cyclists, gravel riders, and performance-focused customers. However, they are not always easy to merchandise.
A customer walking into a bike shop may see several pump types:
- compact hand pumps
- floor pumps
- CO₂ inflators
- electric mini pumps
- high-pressure pumps
- high-volume MTB pumps
If the differences are not explained clearly, customers may compare only price, size, or maximum PSI. A high-pressure pump may look more expensive without making its purpose obvious.
For bike retailers, effective merchandising should answer three questions quickly:
- Who is this pump for?
- What problem does it solve?
- Why should the customer choose it over another pump type?
This article explains how retailers can position high-pressure pumps more clearly through shelf placement, signage, comparison displays, and staff guidance.

Why High-Pressure Pumps Need Clear Retail Positioning
High-pressure pumps are not universal products.
They are generally most relevant for:
- road cyclists
- performance riders
- gravel users who need higher pressure capability
- riders who value accurate pressure control
- customers looking for premium or specialized accessories
Mountain bike riders may care more about air volume than maximum PSI. City bike users may prefer simple, affordable pumps. Bike shops may need commercial floor pumps for daily service.
Because customer needs differ, high-pressure pumps should not be placed on the shelf without context.
If the packaging only says “150 PSI” or “high pressure,” customers may not understand why that matters. Retail communication should connect the specification with the use case.
A clearer message is:
- designed for road and performance tires
- suitable for higher-pressure inflation
- compact emergency support for rides
- precise pressure control for narrow tires
- Presta-compatible design
This helps the product feel relevant rather than overly technical.
Place High-Pressure Pumps Near the Right Categories
Shelf placement affects how customers interpret the product.
High-pressure pumps should usually be placed near products that support the same riding scenario.
Useful placement areas include:
- road bike accessories
- performance cycling tools
- tire repair products
- CO₂ inflators
- compact emergency kits
- premium floor pumps
- gravel cycling accessories
- Presta valve products
Placing a high-pressure pump beside general household accessories may weaken the message. Placing it near road tires, inner tubes, CO₂ systems, and saddle bags makes the intended use easier to understand.
For larger stores, retailers can also create a dedicated “Inflation Solutions” section with clear subcategories:
- home and workshop
- portable emergency
- high pressure
- high volume
- electric and rechargeable
- CO₂ systems
This reduces customer confusion and helps staff explain the category.
Use Signage That Connects PSI with Rider Needs
Maximum PSI is important, but the sign should not stop there.
Retail signage should translate technical pressure capability into rider value.
Instead of displaying only:
150 PSI High-Pressure Pump
A stronger message could be:
High-pressure inflation for road and performance tires
or:
Compact pressure support for road, gravel, and emergency ride use
Useful signage points may include:
- recommended bike types
- Presta or Schrader compatibility
- maximum pressure
- digital or analog gauge
- portable or floor-pump design
- emergency or regular-use positioning
- battery information for electric models
The goal is not to include every specification. The goal is to help the customer decide whether the pump matches their bike.
Compare High-Pressure Pumps with Other Pump Types
A comparison display can make the product category easier to understand.
For example:
| Pump Type | Best For | Main Strength |
|---|---|---|
| Hand pump | Casual and emergency use | Simple and affordable |
| CO₂ inflator | Fast roadside inflation | Very compact and quick |
| Floor pump | Home and shop use | Stable and efficient |
| High-volume pump | MTB and wider tires | Moves more air |
| High-pressure pump | Road and performance tires | Supports higher PSI |
| Electric mini pump | Portable automatic inflation | Convenient and rechargeable |
This kind of comparison helps customers understand that a high-pressure pump is not necessarily “better” than every other pump. It is better for a specific job.
For retail staff, the comparison also provides a simple way to guide customers.

Show the Product in a Real Riding Context
High-pressure pumps are easier to understand when customers can see where they fit into a riding routine.
Useful display visuals may show:
- a road bike wheel with a Presta valve
- the pump stored in a saddle bag
- the digital pressure screen
- a rider making a roadside top-up
- the product beside road tires or repair tools
- pressure comparison between road and MTB tires
For electric high-pressure pumps, retailers should also show:
- charging method
- number of useful top-ups
- preset pressure
- auto stop
- compact carry size
- heat-control guidance
A white-background product image is useful, but a real-use image explains value more quickly.
Use Cross-Selling to Build a Complete Riding Kit
High-pressure pumps can support cross-selling when placed with related cycling products.
Useful combinations include:
- high-pressure pump + spare road tube
- high-pressure pump + patch kit
- high-pressure pump + saddle bag
- high-pressure pump + valve adapter
- high-pressure pump + tire pressure gauge
- electric pump + charging cable + storage pouch
- high-pressure pump + CO₂ backup system
These combinations help customers imagine the product as part of a complete riding kit.
For retailers, this can increase basket value while also making the pump’s purpose clearer.
A customer buying road tires or a saddle bag may be more receptive to a compact high-pressure pump than a customer browsing general accessories.
Train Staff to Ask the Right Questions
Retail staff should not begin by asking, “How much PSI do you need?” Many customers do not know.
A better consultation starts with simple questions:
- What type of bike do you ride?
- What tire width do you use?
- Is your valve Presta or Schrader?
- Do you need a home pump or something portable?
- Is this for emergency use or regular inflation?
- Do you prefer manual or electric operation?
These questions help identify whether a high-pressure pump is appropriate.
For example:
- A road cyclist wanting a compact backup may need a high-pressure mini pump.
- A home user may prefer a stable floor pump.
- An MTB rider may need a high-volume pump instead.
- A bike shop may need a commercial floor pump for repeated use.
Staff training prevents overselling and helps customers choose more accurately.
Merchandising Electric High-Pressure Pumps
Electric high-pressure pumps need additional explanation because they combine pressure performance with battery-powered convenience.
Retailers should communicate:
- battery capacity or real top-up performance
- charging method
- pressure accuracy
- supported valve types
- maximum PSI
- recommended duty cycle
- heat and cooling guidance
- product size and carry method
The strongest retail message is usually not:
The highest PSI electric pump
A better message is:
A rechargeable, compact pump for high-pressure ride emergencies and controlled tire top-ups
This sets realistic expectations and avoids presenting the product as a replacement for every floor pump or shop compressor.
Packaging and Shelf Card Recommendations
Packaging and shelf cards should use a clear information hierarchy.
A useful structure is:
Front of Package
- product type
- primary use case
- compatible bike types
- maximum pressure
- key convenience feature
Side or Back
- valve compatibility
- pressure range
- charging information
- battery performance
- included accessories
- operating instructions
- safety and heat guidance
Shelf Card
- best for road / gravel / performance riders
- portable or home-use role
- manual vs electric operation
- key reason to choose this model
This structure helps both customers and staff understand the product quickly.
What B2B Buyers Should Prepare for Retail Launch
Before supplying high-pressure pumps to retail stores, B2B buyers should prepare:
- Clear bike-type compatibility
- Accurate PSI information
- Valve compatibility illustrations
- Product-use photos
- Simple comparison with other pump types
- Staff sales guidance
- Shelf or packaging icons
- Cross-selling recommendations
- Battery and runtime explanation for electric models
- Realistic claims about speed and high-pressure performance
These materials help retailers sell the product more effectively and reduce wrong expectations.
Common Merchandising Mistakes
One common mistake is placing all bike pumps together without segmentation.
This forces customers to compare products that serve completely different purposes.
Another mistake is focusing only on maximum PSI. Customers need to know which bikes and use cases the pump supports.
Retailers should also avoid vague terms such as:
- professional pump
- ultimate pressure
- suitable for all bikes
- one pump for every rider
Unless the product can genuinely support those claims, clearer and narrower positioning is more credible.
Conclusion
Merchandising high-pressure pumps successfully requires more than placing them on a bike accessory shelf.
Retailers need to connect pressure capability with real rider needs. High-pressure pumps should be positioned clearly for road, gravel, and performance cycling rather than presented as universal products.
The best merchandising strategy combines:
- correct shelf placement
- use-case signage
- pump-type comparison
- real riding visuals
- staff training
- cross-selling
- clear packaging
For B2B buyers, good retail support can make the difference between a product that looks technical and a product that customers immediately understand.
A high-pressure pump sells more effectively when the customer knows exactly why it belongs in their riding kit.